

External dimensions of the Bedside Crib
Length = 90 cm
Height = 63 or 70 cm (height adjustable)
Sleeping area: 43 × 86 cm

Mama and Baby have been inseparable for 9 months – why should it change after birth? With our bedside crib, also called baby balcony, baby and mother remain physically close for another 9 months. The open side of the bedside cot is simply placed right next to “Mama’s” bed.
Advantages for Mum
Breastfeeding is now a lot more pleasant at nighttime. You do not have to get up first, go to another room, pick up your crying baby and then sit down to breastfeed. Now you can stay in bed – without you and your baby waking up fully. Your metabolism won’t have to power up, again and again, every time. After breastfeeding, you have all of your bed to yourself again. You will experience a much more restful sleep.
Advantages for the baby
The child does not experience the nighttime sleep as a time of separation, but rather as a pleasant time close to their mother and will naturally sleep calmer and better. Physical closeness to the parents during the first months of life is of great importance for the physical, emotional, and intellectual development of kids.
Treat yourself and your child!
The Bedside Crib is height adjustable and is attached to the parents’ bed with sturdy Velcro straps (included). In addition, each baby balcony has a practical little storage table for diapers, pacifiers etc. You can also get a matching mattress on request.
And when the time for nighttime breastfeeding is over, the bedside cot can be easily converted into an arts and crafts table, a doll’s house, a children’s bench and so much more.
The following is a simplified construction manual to assist you in building your own Bedside Crib. Have fun building!
You need
Wooden parts
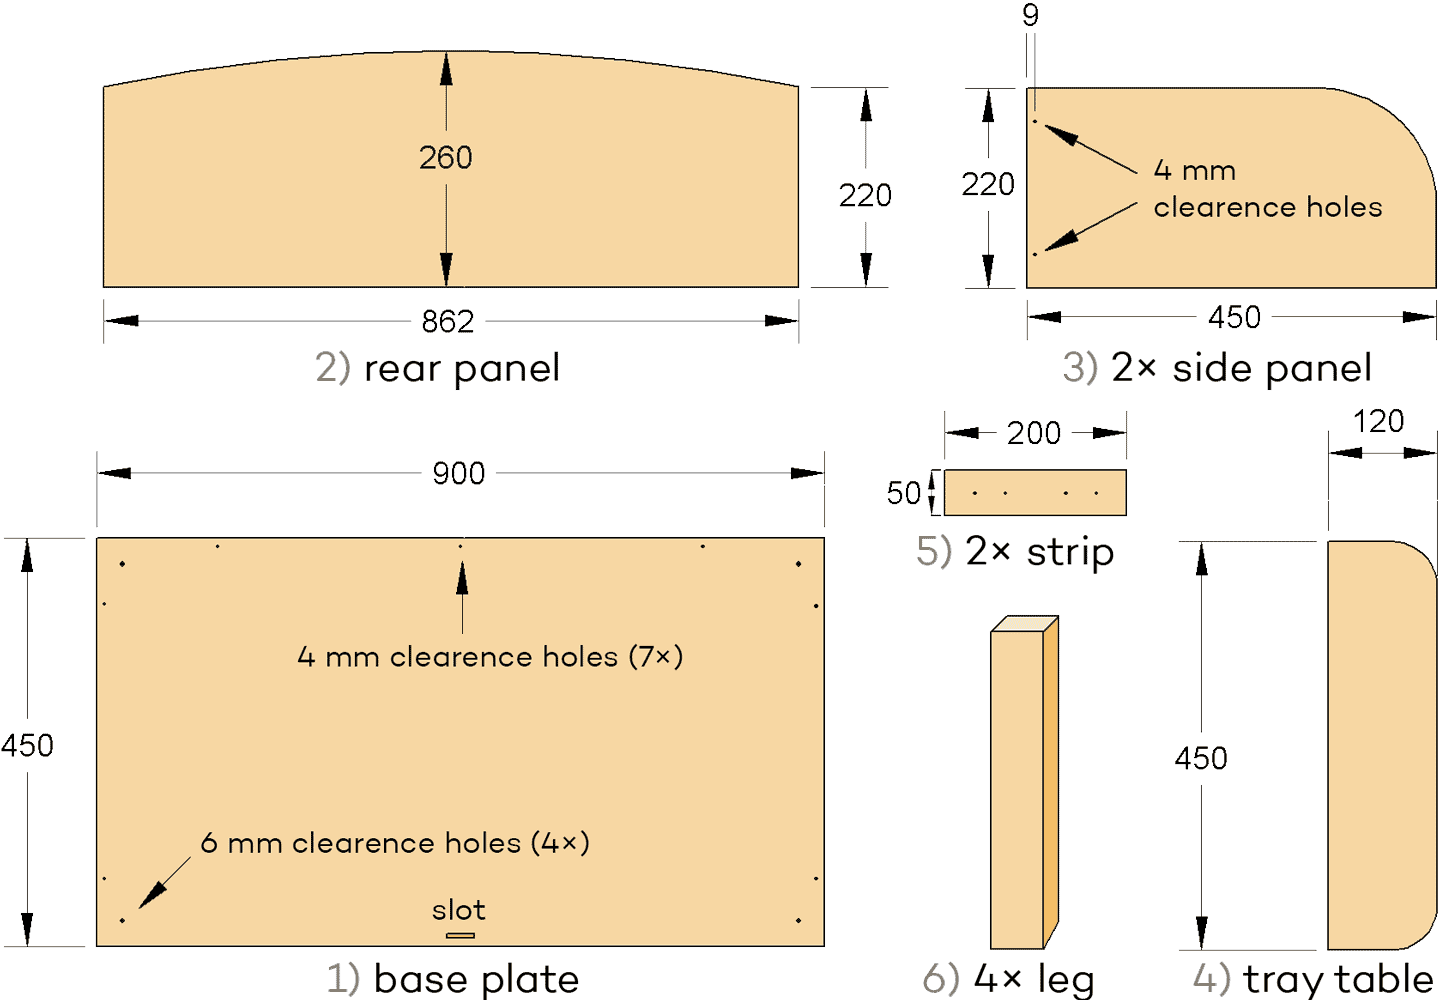
Get the base plate, rear panel, side panels, tray table and strips for the tray table cut in a rectangular shape from a pollutant-free 19 mm three-layer plate to the specified dimensions at a hardware store:
1) base plate 900 × 450 mm
2) rear panel 862 × 260 mm
3) 2× side panel 450 × 220 mm
4) tray table 450 × 120 mm
5) 2× strip to attach to the tray table 200 × 50 mm
In addition, you will need 4 legs made of square-cut wood (approx. 57 × 57 mm). The height of the legs is derived from the height of the parents’ bed: The upper edges of the mattress of the parents’ bed and the mattress of the Bedside Crib should be at about the same height. (Upper edge of the mattress of the Bedside Crib = height of legs + thickness of base plate [19 mm] + height of the baby mattress.)
Crosshead screws (SPAX)
a) 4×40 mm (11 screws)
b) 6×60 mm (4 screws)
c) 4×35 mm (8 screws)
You are welcome to use more elaborate techniques instead of crosshead screws when connecting the parts.
Tools
crosshead (Phillips) screwdriver
jigsaw
sand paper
recommended: router (to round the edges)
Crafting the parts
Cutting the curves:
The illustration points out which curves should be cut into which parts.
Lightly draw the curve on the rear panel. You will get a nice curve if you bend a thin flexible band of approximately 100 cm length until you get the desired arch and then have a helper trace this curve for you onto the rear panel.
To mark the curve on the sides and the tray table, use pots of the appropriate size.
Now cut the wood along the marked curve with a jigsaw.Connecting bore:
There are 4 mm clearance holes in the base plate and the side panels, see illustration. Counter-bore these holes so that the screw heads do not protrude later.
The holes for the legs in the corners of the base plate should have a 6 mm diameter. Counter-bore these holes, too.Slot at front edge:
In order to later attach the Bedside Crib to the parents’ bed with a Velcro strap, make a slot in the base plate at the front edge (1 cm towards the inside, about 30 × 4 mm). Lightly mark the slot in pencil, make several holes with the 4 mm drill until the jigsaw blade fits, and then cut it out with the jigsaw.Rounding the edges:
Rounding works best if a router is available (6 mm radius). Finishing is done manually with sand paper.
If you don’t have a router: sand, sand, sand!
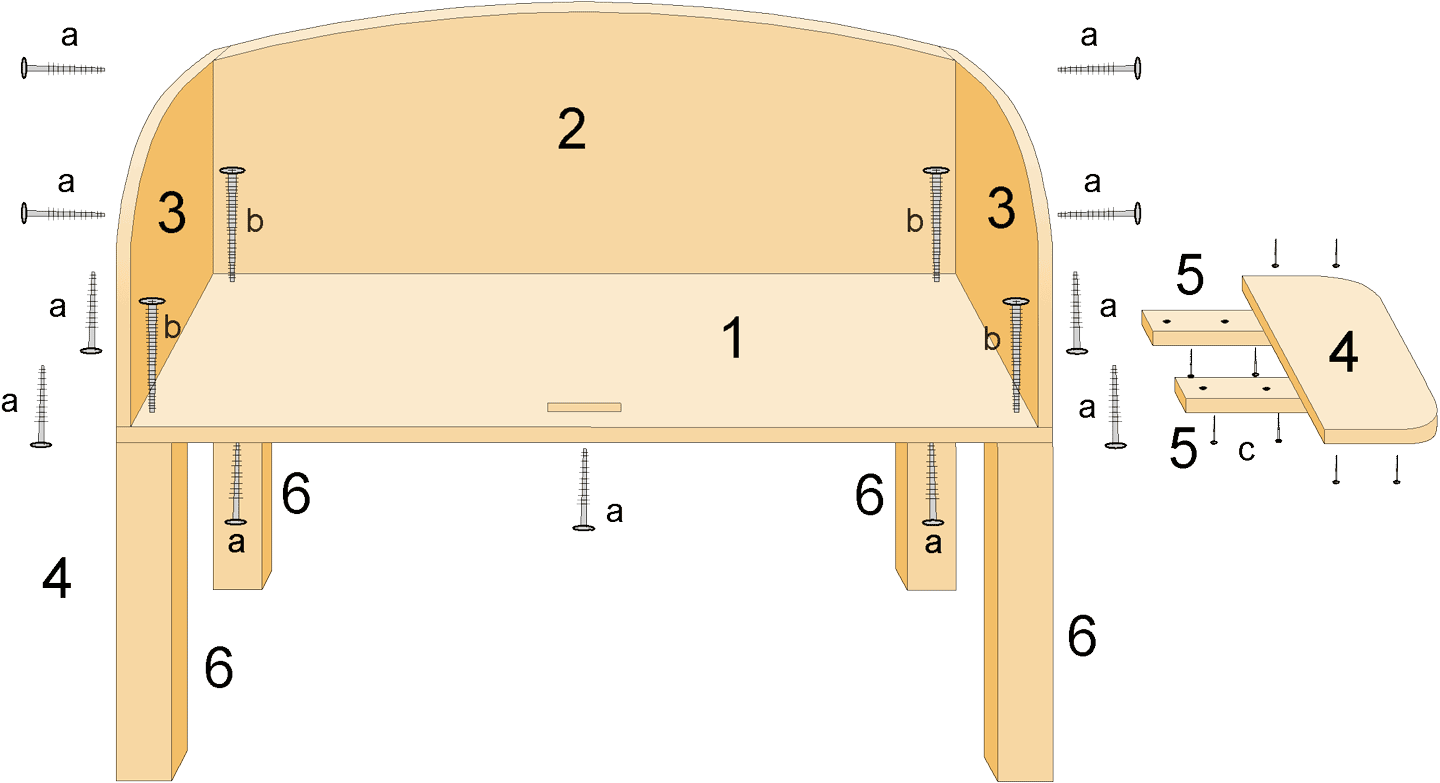
Assembling
Attach rear panel (2) first to the base plate (1).
Attach the side panels (3) to the base plate (1). Connect the side panels (3) to the rear panel (2) with screws.
Screw the legs (6) to the base plate (1).
Screw the strips (5) onto the tray table (4) so that half of the strip is visible. Now place the tray table (4) with strips (5) attached either on the left or right side of the crib and screw them together. Done!
If necessary, tighten the screws after a while.
The Bedside Crib can no longer be used as a bed once your baby starts crawling, for safety reasons.
If you have questions you are welcome to contact us.
These instructions may only be used for private and personal use. Any liability for damages resulting from building and subsequent use is expressly excluded.
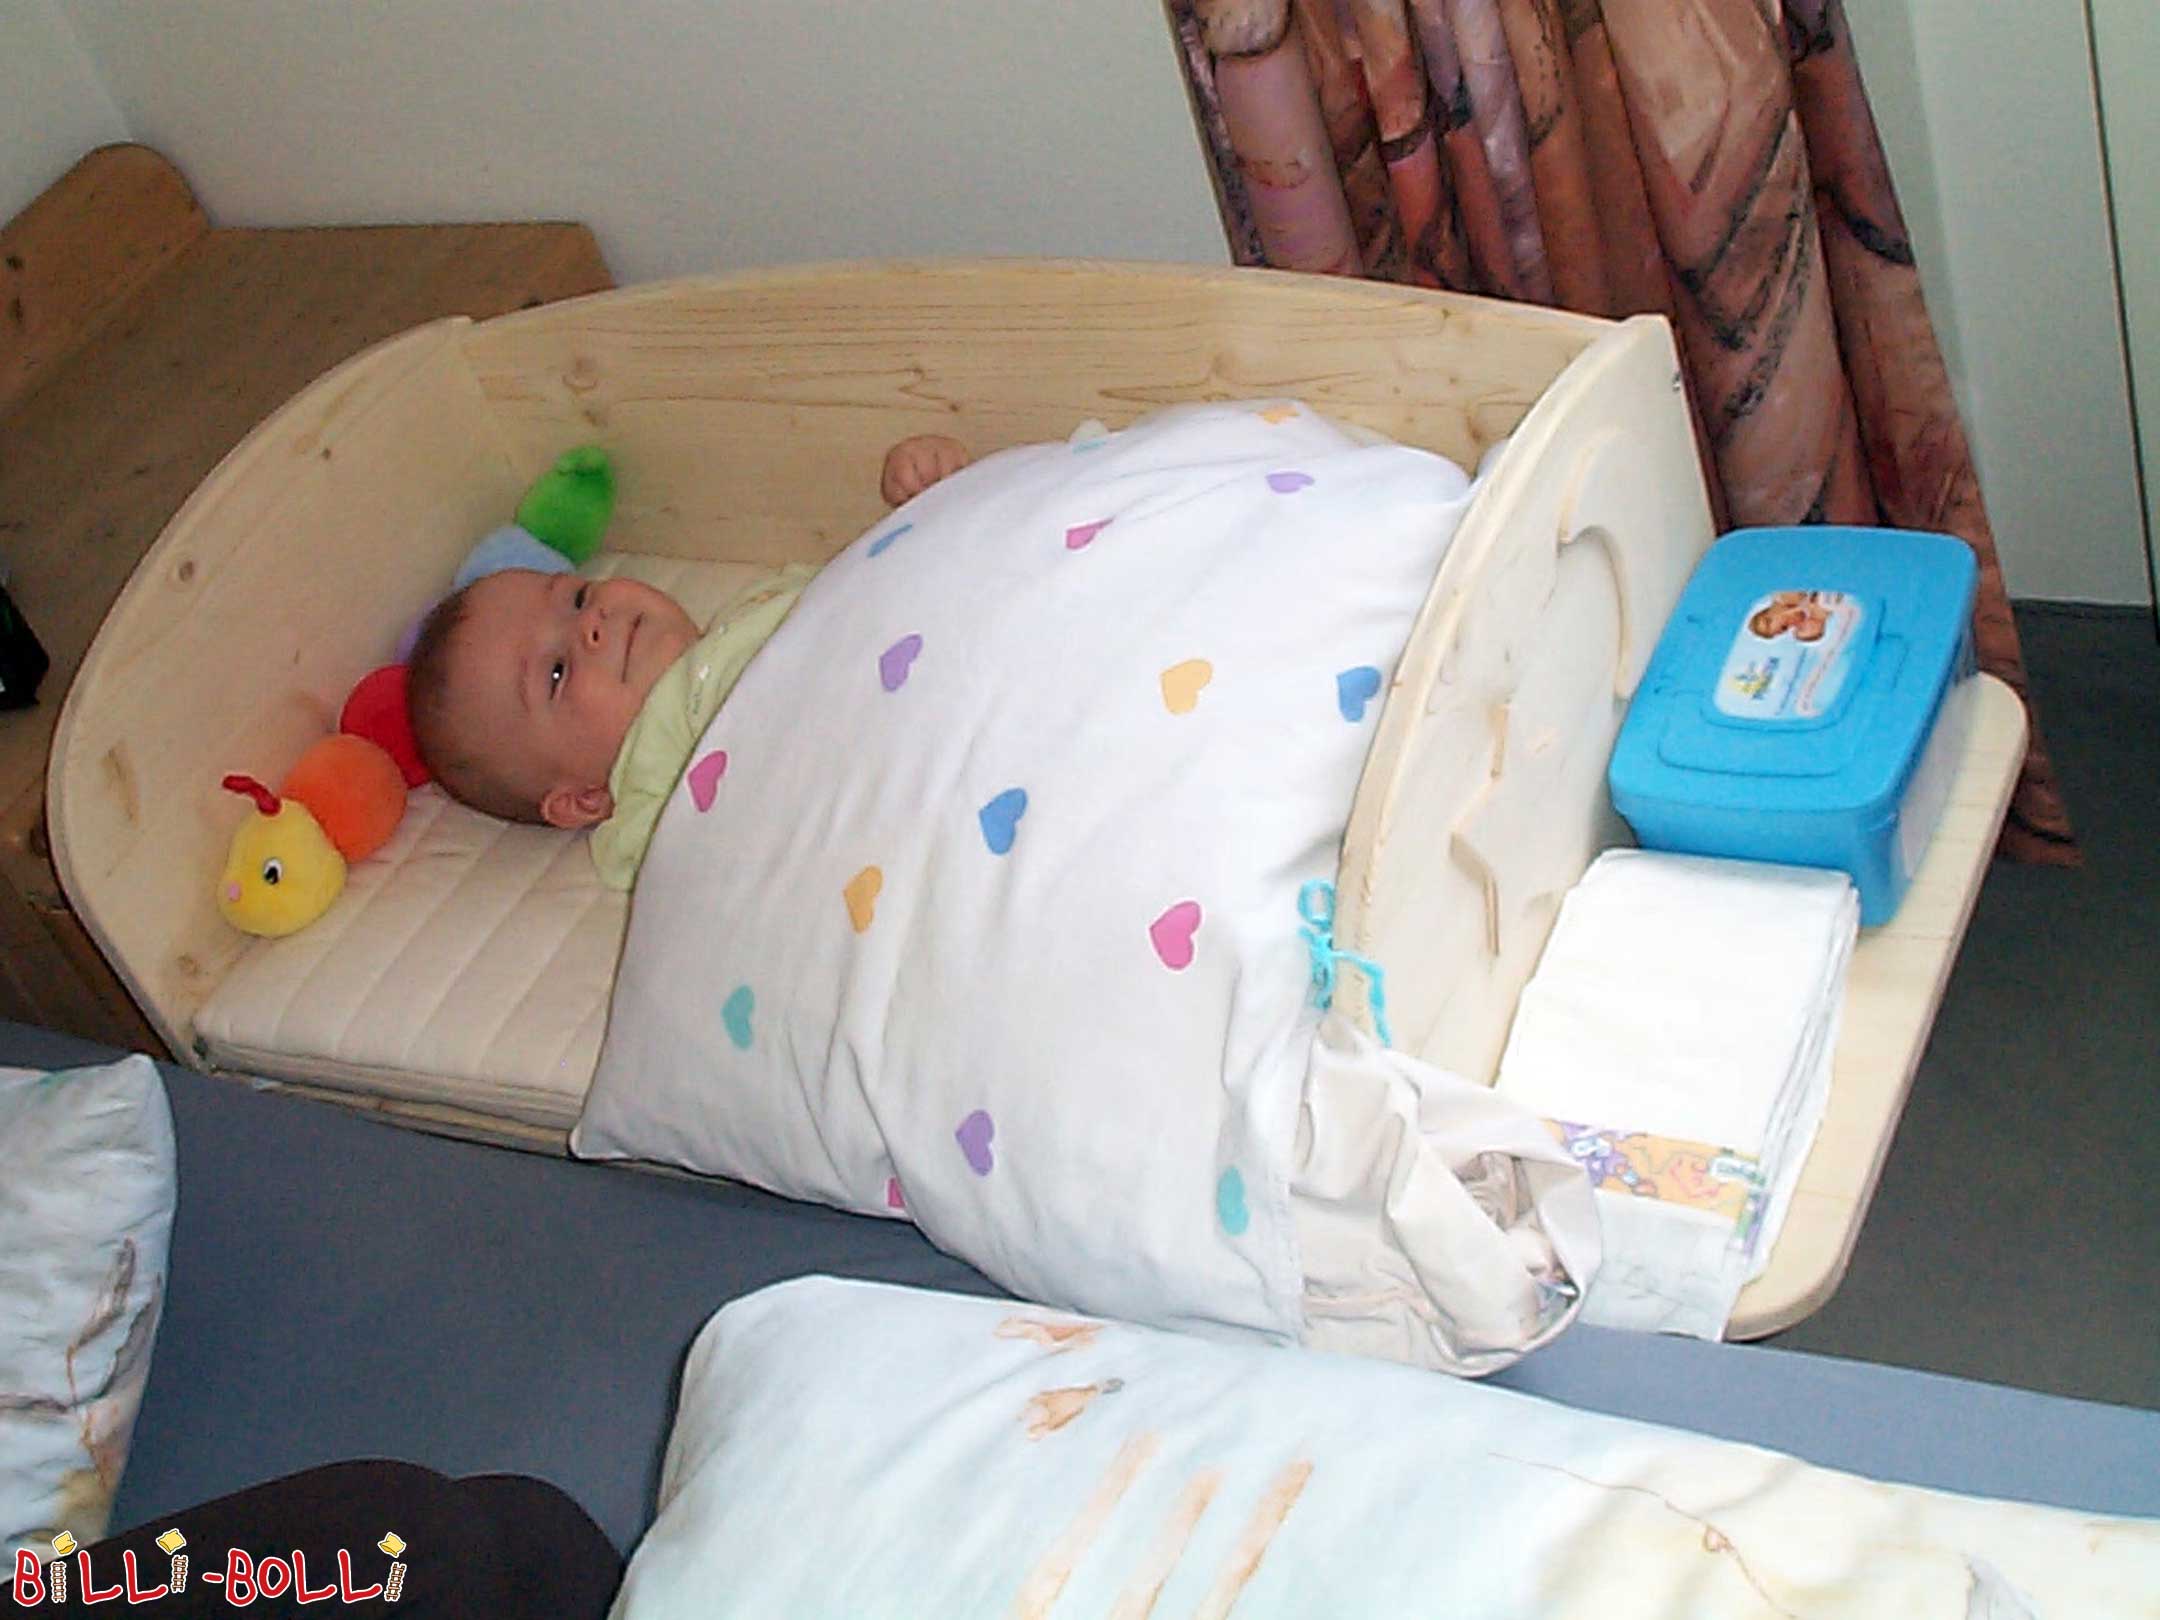
Customer photos and experiences with the Bedside Crib
")
Dear Billi-Bolli team!
I’d like to leave you all a short review since I am so satisfied with your bedside crib:
Our son Valentin was born on 8th January. Since then he has been sleeping in his Billi-Bolli bed and is obviously very content. For us, it was surely a very good decision to purchase this bed because nights have been so stress-free. When I want to feed our Valentin, I simply bring his bed closer to me. And if I fall asleep, there is no danger that he will fall out of his bed; he can simply roll back into his crib. In addition, he is very seldom fully awake during nursing nowadays. This is great for my husband as well, and he hardly notices that I’m breastfeeding Valentin. The nights surely wouldn’t be as refreshing if we had opted for a standard crib instead (which, of course, would have included waking up, getting out of bed, taking him out of the crib, screaming, …).
Thanks for this great idea!
Judith Fillafer-Schuh